Got a massive video file that just won't send? I've definitely been there. The quickest way to shrink a video on your Mac is to use the built-in QuickTime Player, which is perfect for simple jobs. But if you need more control over the final quality and format, a free tool like HandBrake is my go-to recommendation.
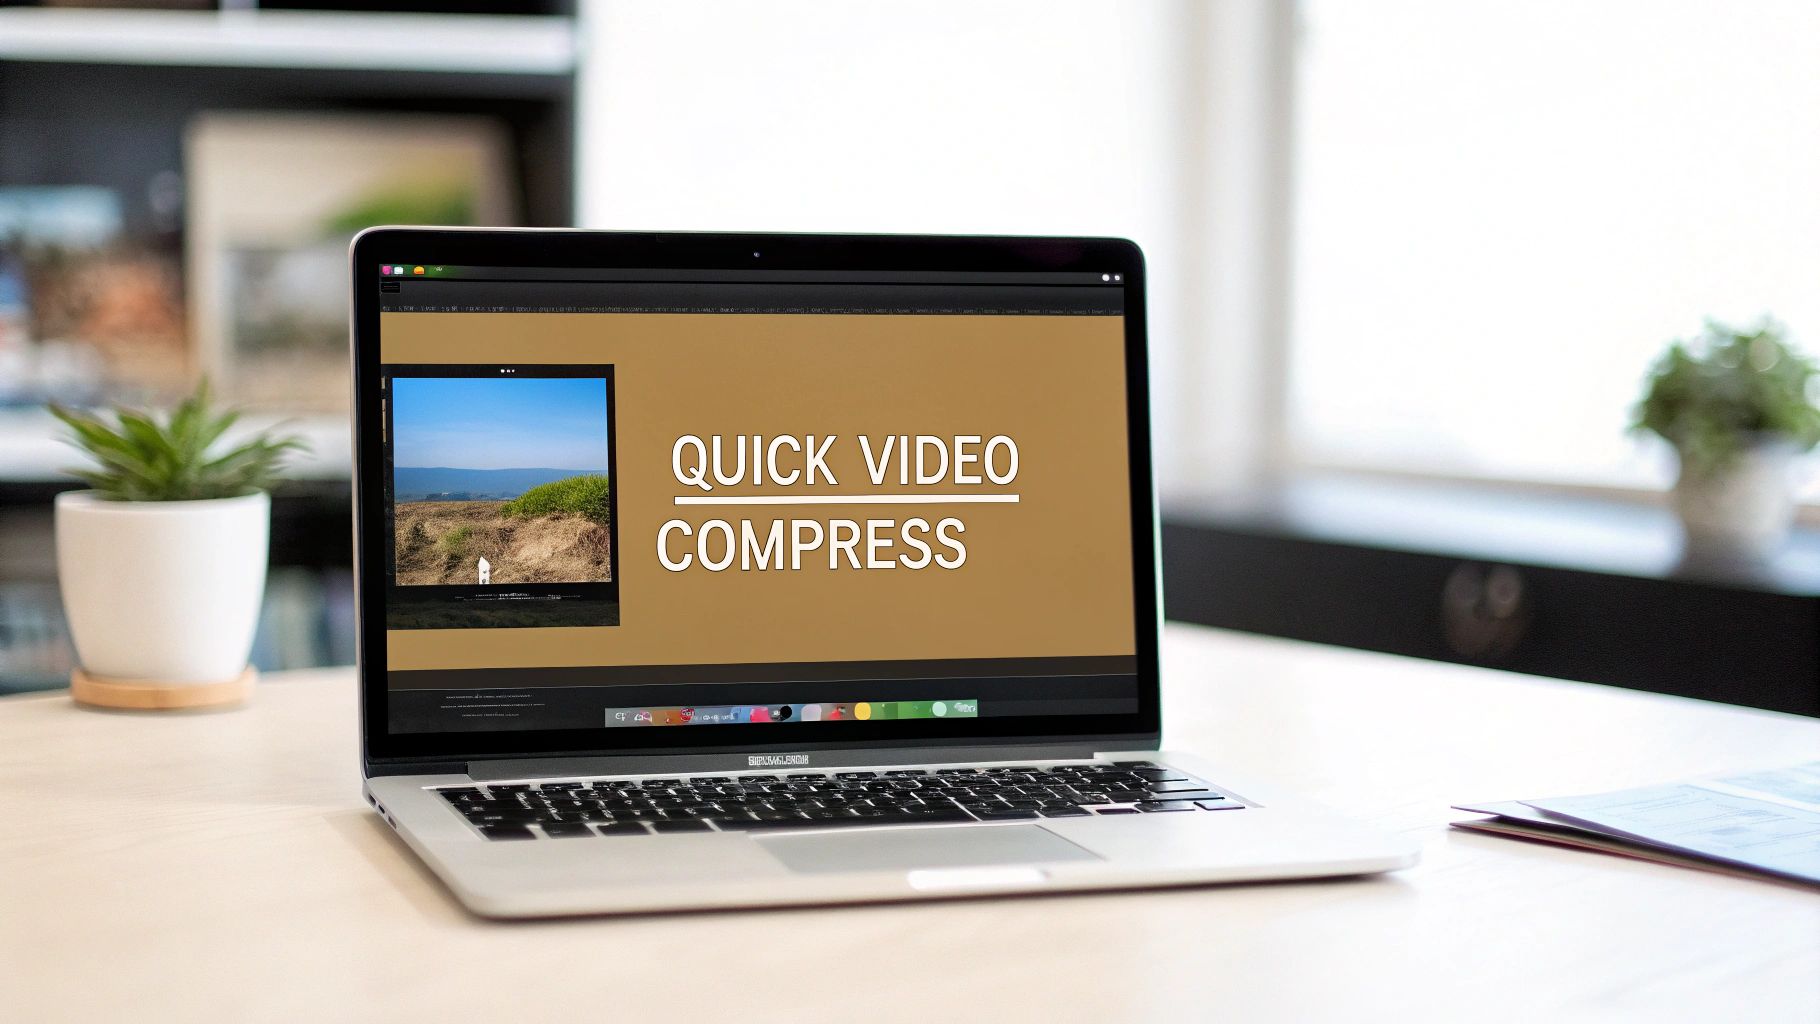
Your Quick Guide to Compressing Video on Mac
I'll never forget the time I had a 5GB client file that needed to be sent over on a ridiculously tight deadline. The raw footage was stunning, but completely unsendable via email or any standard service. That little moment of panic forced me to figure out the best tools for compressing video on a Mac without turning my beautiful work into a pixelated mess.
The real key is knowing which tool fits the job. Are you just sending a quick screen recording to a colleague? Or are you delivering a final cut to a client? Each scenario demands a different approach.
This experience also taught me that after you finally get the file size down, the next challenge is actually sending it. That’s where a service like HeftySend becomes a lifesaver. It lets you bypass those frustrating email attachment limits entirely. For more deep dives into content creation workflows, you can check out other articles on our blog.
Finding the Right Tool for the Job
So, how do you choose? It all comes down to balancing three things: speed, ease of use, and final quality. To make it simple, here’s a little decision tree to help you pick the right path based on your main priority.
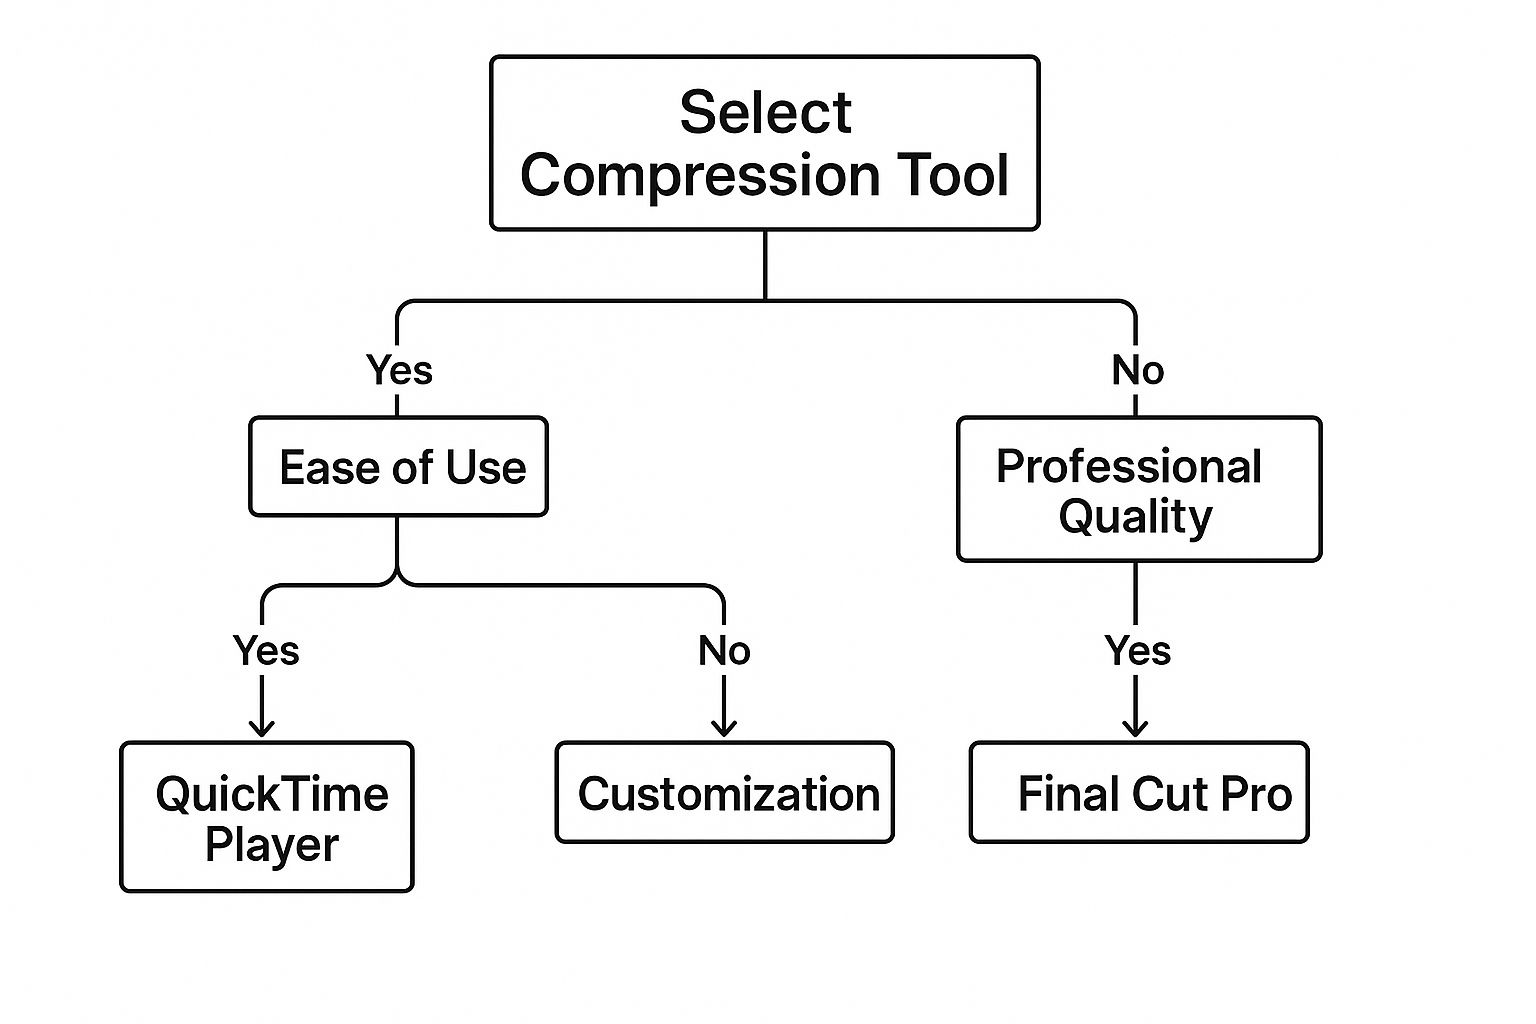
As you can see, QuickTime is the winner for quick and simple tasks. HandBrake hits that sweet spot in the middle, offering great customization without being overwhelming. For absolute top-tier quality, you'll want to look at professional editing software.
The core idea behind making these files smaller isn't exactly new. Video compression actually dates back to 1929 when the concept of interframe compression was first proposed. This basic principle—only encoding the changes between frames instead of the entire frame each time—is still the foundation of modern video technology. It's pretty cool to see how far we've come.
My personal rule of thumb is this: if the video is for a client or will be seen by the public, I use a tool that gives me more control. If it's just for a quick internal review, I use whatever is fastest.
Which Mac Video Compression Tool Is Right for You?
Still not sure which tool to grab? Here's a quick side-by-side comparison of the most popular free options to help you decide.
| Tool | Best For | Key Feature | Cost |
|---|---|---|---|
| QuickTime Player | Quick, simple exports and resolution changes. | Already built into macOS, so there's nothing to install. | Free |
| HandBrake | Balancing quality, file size, and format options. | Huge selection of presets for devices and platforms. | Free |
| FFmpeg | Advanced users who want total control via command line. | Unmatched power and flexibility for custom workflows. | Free |
Ultimately, QuickTime is fantastic when you just need to get something done fast. HandBrake is the best all-arounder for most people. And FFmpeg is the powerhouse for developers or video pros who know exactly what they want.
How to Prepare Your Videos for Compression
Before you even think about hitting that compress button, a little prep work can save you a massive headache and give you much better results. I've learned the hard way that jumping straight into compression without a plan often leads to messy files, lost originals, and a ton of wasted time.
It’s like trying to cook a gourmet meal in a chaotic kitchen—you might get it done, but it won’t be pretty.
The first thing I always do is get my footage organized. Create a dedicated project folder, and inside that, make subfolders for "Originals," "Exports," and "Compressed." This simple step is a non-negotiable part of my workflow because it prevents you from accidentally overwriting your master copy. Always, always work from a duplicate.
Next up, I give my files clear, descriptive names. Something like ProjectX_Draft1_1080p.mov tells you everything you need to know at a glance. You really want to avoid generic names like video_final_final2.mov. Trust me, your future self will thank you when you're searching for a specific version weeks later.
Fine-Tuning Before You Shrink
Once everything is organized, it's time for a quick trim. Open your video and just chop off any unnecessary bits at the beginning or end—the seconds of silence, the clapperboard, or that awkward pause before you started talking. Every second you remove is data you don't have to compress, which directly leads to a smaller final file.
This pre-compression editing is also the perfect time to think about what the video is actually for. The initial quality and purpose of the video are paramount. For instance, if you're creating content for marketing, you should learn how to create compelling product videos that are optimized from the start. That way, your compression efforts will yield the best possible results.
Another crucial choice is picking the right container format. Think of this as the "box" your video lives in.
- MP4 (.mp4): This is the universal standard. It's highly compatible with almost every device and platform out there, making it my go-to choice for web, social media, and final deliveries.
- MOV (.mov): This is Apple’s native format. It's excellent for editing on a Mac, especially if you're staying within the Apple ecosystem, as it can hold high-quality video and audio with less initial compression.
The evolution of these formats is pretty fascinating. The introduction of MPEG-2 in 1996 was a huge turning point, enabling platforms like DVDs and early streaming services to deliver high quality at lower bitrates. You can discover more insights about the evolution of video compression and see how those foundational steps still impact us today.
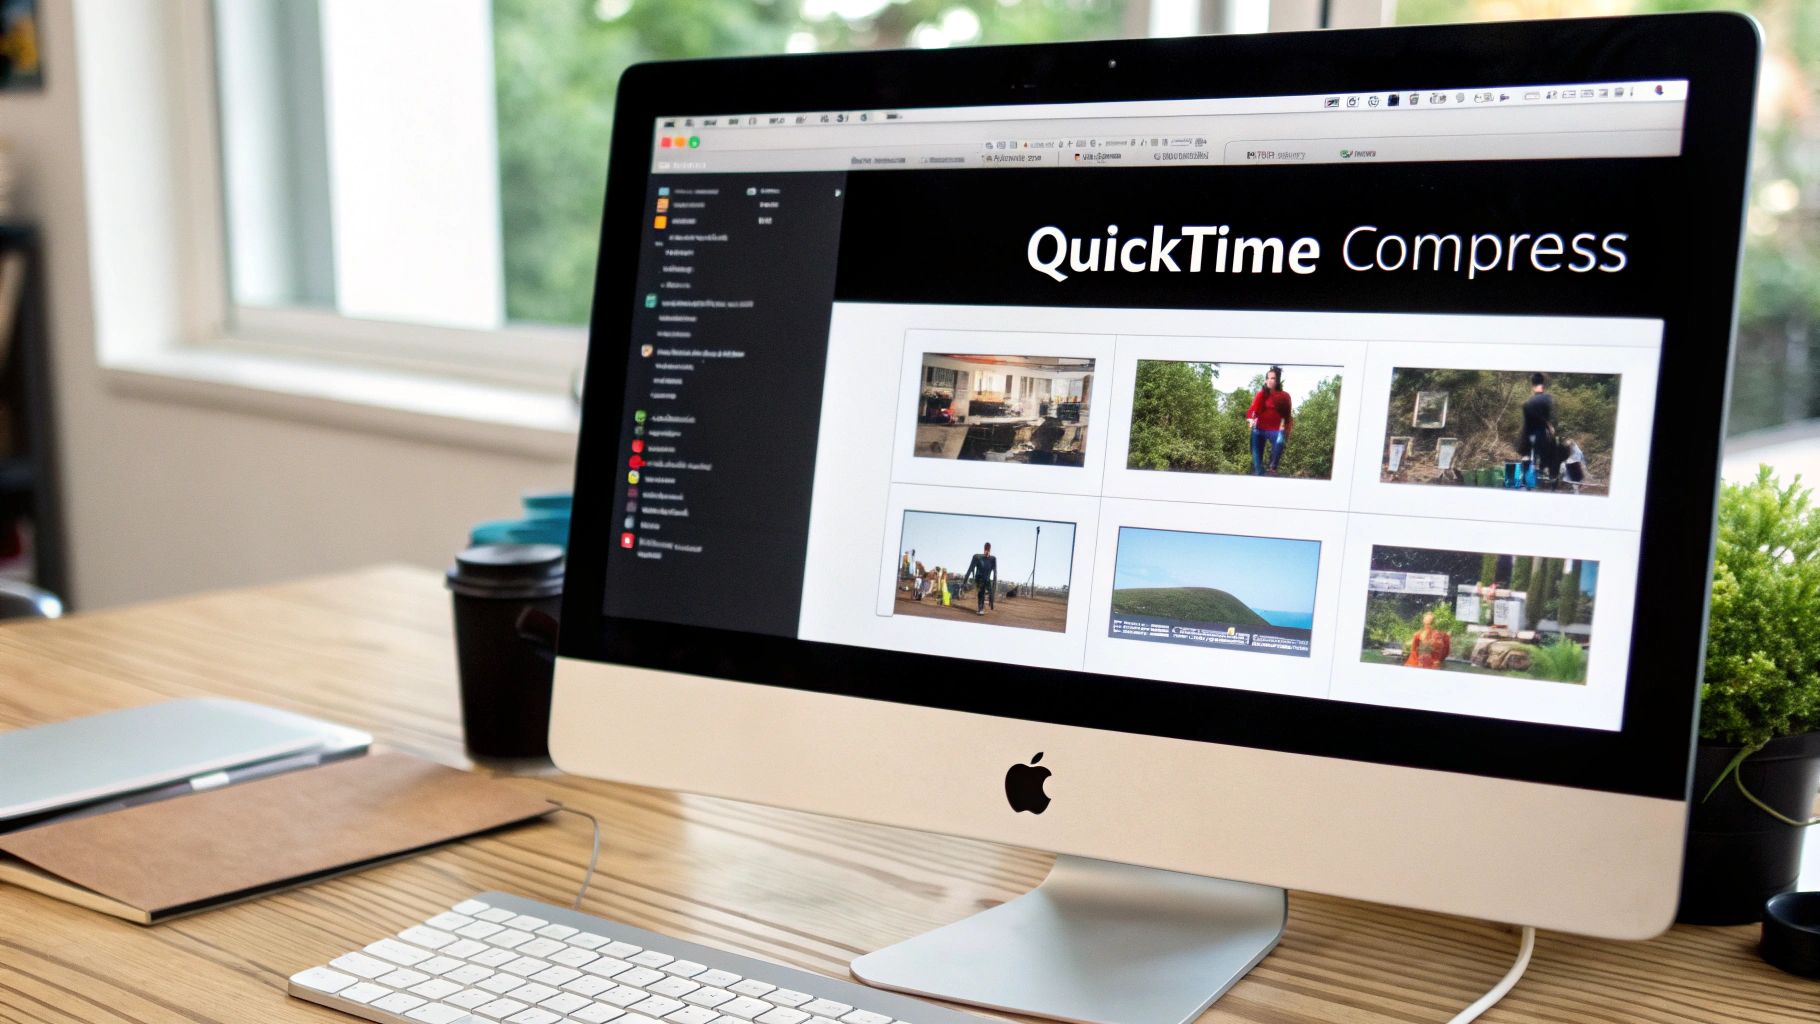
Using QuickTime for Quick and Easy Compression
Sometimes you just need to get a video compressed fast, without the hassle of downloading and learning new software. For those moments, QuickTime Player is your best friend. It’s already on your Mac, and it’s surprisingly good for quick-and-dirty compression jobs.
I turn to it all the time when a screen recording is just a bit too big to email. Its beauty is in its simplicity—no confusing menus or a hundred different settings to tweak. Instead, you get a handful of presets that shrink your file with just a couple of clicks.
It's the perfect tool when speed is more important than granular control.
Navigating the Export As Menu
Once you have your video open in QuickTime, the real work happens in the "Export As" menu.
Just head up to the menu bar and click File > Export As. You’ll see a short list of resolution options, usually from 4K down to 480p. It's a simple trade-off: the lower the resolution you pick, the smaller your final file will be.
Here’s a perfect real-world example from a project I worked on last week:
- The Original: I had a 4K screen recording for a client that was a massive 1.2 GB. Great quality, but totally impossible to send over email.
- The Goal: I just needed their quick feedback, so top-tier quality wasn't the priority. A smaller file size was.
- The Action: I popped it open in QuickTime, went to
File > Export As, and chose the 1080p option. - The Result: Less than two minutes later, QuickTime handed me a new file that was only 185 MB. It still looked perfectly sharp on a laptop and was easy to attach and send.
This kind of efficiency is built deep into macOS. Back in 2005, QuickTime was an early adopter of the H.264 codec, which cut bitrates by about 50% compared to older standards without a noticeable drop in quality. If you're curious, you can dive into the history of video coding standards to see just how far this tech has come.
Knowing QuickTime’s Limits
While it's fantastic for simple jobs, QuickTime isn't a one-size-fits-all solution. You can't fine-tune the bitrate, mess with the audio quality, or switch codecs. You’re stuck with whatever the presets give you.
The moment you find yourself thinking, "I wish I could make this just a little smaller without dropping to 720p," that's your sign. It's time to graduate to a more powerful tool like HandBrake where you get full control.
Even at 185 MB, my compressed file was still too large for some of my client's email servers. Instead of crushing the quality down even further, the smarter move is to sidestep email limits altogether. That’s why we built HeftySend—you can upload the file in seconds and generate a simple share link, saving you from any more compression headaches. Give it a try!
Mastering Video Compression with HandBrake
When QuickTime’s simple approach just won't cut it, it's time to bring in the heavy hitter: HandBrake. It's a fantastic free, open-source tool that gives you an incredible amount of control over your video compression. Honestly, it's my go-to for almost any task that needs a perfect balance between a small file size and crisp, clean quality.
I'll admit, it can look a bit intimidating when you first open it up—all those tabs, settings, and sliders. But once you get a feel for the basics, you'll be shrinking down massive video files like an absolute pro.
Finding Your Perfect Preset
The absolute easiest way to jump in is with HandBrake's built-in presets. Think of these as pre-made recipes optimized for specific devices or platforms, like Apple TV, Android, or the web.
For most of what I do, especially when I’m compressing tutorials for YouTube, I start with the Fast 1080p30 preset. It’s an amazing starting point. It kicks out a great-looking video in a web-friendly MP4 format and doesn’t take an eternity to encode. From there, I just make a couple of key tweaks.
This is the main HandBrake interface. You can see the presets neatly lined up on the right and the tabs for more advanced settings in the middle.
Everything is laid out pretty logically, from picking your source video at the top to dialing in your output settings at the bottom.
Fine-Tuning with the Quality Slider
Now, the real magic of HandBrake happens in the "Video" tab. You're looking for the Constant Quality slider, which you might see labeled as RF or CRF. This is where you tell the software what level of visual quality you're aiming for, and it cleverly adjusts the bitrate on the fly to hit that target.
- Lower RF values (like 18-20): This gives you higher quality but also a larger file. I use this range when I'm sending final versions to clients who need top-notch video.
- Higher RF values (like 22-24): You'll get a smaller file, but the quality will be a bit lower. This is perfect for sending drafts or for internal reviews where file size is more important.
For my YouTube tutorials, I’ve found that an RF value of 22 is the sweet spot. It dramatically shrinks the file size—often making it 60-70% smaller than the original screen recording—while keeping all the on-screen text and graphics perfectly sharp and readable.
My Personal Workflow Tip: I've created my own custom preset to speed things up. I just selected "Fast 1080p30," changed the RF to 22, and saved it as "My YouTube Preset." Now I can apply my favorite settings with a single click. It saves me from having to remember the details every time.
Batch Processing with the Queue
One of HandBrake's most powerful, time-saving features is the Queue. If you’ve got a whole folder of videos to compress, you don't have to sit there and do them one by one. It’s a game-changer.
You just set up the compression settings for your first video, click "Add to Queue," then open the next video and do the same. Repeat until all your videos are in the lineup.
Once they're all ready, you just hit the "Start Queue" button. I often set this up right before I wrap up for the day and just let it run overnight. By the next morning, my entire folder of raw footage is perfectly compressed and ready to go, saving me hours of just sitting around and waiting.
Of course, even after expert compression, some files are just too big to attach to an email. Instead of crushing the quality down even further, I upload the final video to HeftySend. It’s the final, crucial step in my workflow for getting large files delivered to clients and collaborators without any headaches.
Advanced Compression Using FFmpeg and Terminal
Alright, if you're the type who likes to pop the hood and get your hands dirty, it's time to talk about the most powerful tool in the video compression toolbox: FFmpeg.
This isn't some slick app with a shiny interface. FFmpeg is a command-line utility, the raw, unfiltered engine that a surprising number of video converter apps are built on. For those of us who want absolute, pixel-perfect control, it's the ultimate secret weapon for compressing video on a Mac.
If you're comfortable in the Terminal window, FFmpeg offers a level of precision that graphical tools simply can't touch. You can dictate exact bitrates, swap codecs, resize videos down to the pixel, and even rip out audio tracks entirely. Personally, I use it for batch processing or any repetitive task where I need the exact same, predictable result every single time.
This is the FFmpeg logo, a symbol of the immense open-source project that works its magic on all things multimedia.
Seeing this logo means you're dealing with a tool built for pure power and flexibility, trusted by video professionals and developers all over the world.
Getting FFmpeg on Your Mac
First thing's first—you've got to install it. The simplest way to do this on a Mac is with a package manager called Homebrew.
If you don't already have it, just open up Terminal (you'll find it in Applications > Utilities) and paste in the single installation command from the Homebrew website. It does all the heavy lifting for you.
Once Homebrew is ready, installing FFmpeg is just one line in Terminal:
brew install ffmpeg
Let that run its course. Once it's done, you can verify the installation by typing ffmpeg -version and hitting Enter. You'll see a wall of text about your build configuration—that's how you know you're ready for action.
Common Commands for Everyday Compression
Now for the fun part. Let's imagine you have a huge 4K video file from your last trip, MyVacation_4K.mov, and you need to shrink it down to a web-friendly 1080p file.
Here's a simple, effective command you can copy and paste right into Terminal:
ffmpeg -i MyVacation_4K.mov -vf scale=1920:-1 -c:v libx264 -crf 23 -preset medium MyVacation_1080p.mp4
Looks intimidating, but it's pretty straightforward when you break it down:
-i MyVacation_4K.mov: This is your input file—the video you want to compress.-vf scale=1920:-1: This is a video filter (vf) that resizes the video to 1920 pixels wide. The-1tells FFmpeg to automatically calculate the height to maintain the original aspect ratio.-c:v libx264: This sets the video codec to H.264, the universal standard for great compatibility online.-crf 23: This is the Constant Rate Factor, which works a lot like the quality slider in HandBrake. A value of 23 is a fantastic starting point for a solid balance of quality and file size.-preset medium: This setting balances encoding speed against compression efficiency.mediumis a reliable default.MyVacation_1080p.mp4: And finally, this is the name of your new output file.
FFmpeg gives you surgical precision, but it's also incredibly easy to create a pixelated mess if your settings are wrong. My advice? Always run your command on a short, 10-second test clip first before you commit to compressing a large, important video file.
This kind of control is a game-changer, but it definitely comes with a learning curve. For those moments when you just need to get a large file to someone without wrestling with command-line flags, HeftySend is the perfect companion. Compress when you need to, but for simple delivery, you can just sign up for free, upload the original, and share the link in seconds.
The Easiest Way to Share Your Compressed Videos
Alright, so you’ve done the hard work. You've followed the steps, tweaked the settings, and now you have a perfectly compressed video sitting on your Mac. The file is smaller, it's optimized, and it's ready to go.
But now comes the final hurdle: actually getting it to someone.
Trying to attach it to an email? Good luck. Most email providers throw up a wall at around 25 MB. Even a smartly compressed video will likely blow past that limit. And those generic file-sharing sites? They can be clunky, slow, and often plaster your client's screen with ads. It just doesn't feel professional.
This is exactly where a tool built for sending big media files, like our app HeftySend, really shines.

Why a Dedicated Service Is Better
Think about it. Using a service designed for large video files means you don't have to compromise. Instead of crushing your video into a pixelated mess just to sneak it under an arbitrary file cap, you can send it at the quality you intended.
Platforms like HeftySend are built for speed. They use global networks to make sure your uploads—and your recipient's downloads—are as quick as possible. No more staring at a progress bar for what feels like an eternity.
It’s all about creating a smooth, professional experience from your edit bay to their screen. Once your video is compressed, you'll be ready to share it anywhere. For instance, if you're trying to figure out how to post YouTube videos on Instagram, having a properly sized file is half the battle.
Your delivery method is the final handshake with your client or collaborator. A clean, simple download link from a dedicated service says a lot about the quality and care you put into the entire project.
With HeftySend, you just upload your file and get an instant, shareable link. Signing up is fast and easy, giving you the best way to get that final video delivered. To dive deeper, check out our guide on file-sharing to see more ways you can level up your workflow.
Common Video Compression Questions Answered
When you're in the middle of a project, the last thing you need is a technical hiccup. I’ve run into my fair share of them, so I've put together answers to the most common questions I get about compressing video on a Mac. Hopefully, this helps you solve problems fast and get back to creating.
What Is the Best Video Format?
For most situations, you can't go wrong with MP4 using the H.264 codec.
Think of it as the universal language of video. It hits that sweet spot between high quality and a manageable file size, and it plays nice with pretty much every device, platform, and editor out there. It’s my default choice unless a project has very specific requirements.
Will Compression Ruin My Video Quality?
Technically, yes—all compression is "lossy" to some degree. But the goal is to make that loss completely unnoticeable to the human eye.
This is where a tool like HandBrake is so valuable. Its Constant Quality (CRF) setting is brilliant; it intelligently shrinks the file size without turning your beautiful footage into a pixelated mess. You just tell it the quality you want to maintain, and it handles the complex parts for you.
You're always in control of the trade-off. Aggressive compression will save you the most space but can visibly degrade the image. Gentle compression keeps things looking sharp, but the file will be larger.
How Do I Compress Multiple Videos at Once?
This is a classic time-saver, and HandBrake is king here. You can literally drag an entire folder of videos into its queue, apply the same compression preset to all of them, and then just hit start.
I do this all the time after a long shoot. I'll just set up a batch process to run overnight, and in the morning, all my footage is ready to go. It’s a massive efficiency boost.
My Video Is Still Too Big to Email. What Now?
Ah, the classic problem. You've compressed it once, maybe twice, but it's still getting rejected by your email server.
Instead of compressing your video into oblivion and destroying its quality, it's time to stop fighting with arbitrary email limits. This is exactly why dedicated file transfer services exist. We built HeftySend to solve this exact problem, and we take your privacy seriously. You can learn about our commitment in our privacy policy.
Forget another round of compression. Just upload your file to HeftySend and share a simple, professional link. It’s built to handle the large files that creators like us work with every single day. Sign up and get started for free at HeftySend.com.